It Doesnt Say I Uploaded a Site Icon Wordpress
Branding experts will often talk about visibility. In other words, user-facing elements of your site should practically always reverberate your branding. However, one project you may not have considered is to create a site icon for your WordPress website.
The skillful news is that it'due south easier than ever to design and upload your site icon to WordPress. In fact, there are a number of ways to get the chore done regardless of your expertise, time, and upkeep.
In this post, we'll look at how to create a site icon for your site. First though, we'll outline why you'd want to consider creating a site icon, along with some considerations you'll need to brand.
What a Site Icon Is (And Why You Need One)
You've likely seen a site icon, fifty-fifty if you're not sure what they are. In fact, you've already looked at one – bank check out the top left-hand corner of your browser window:
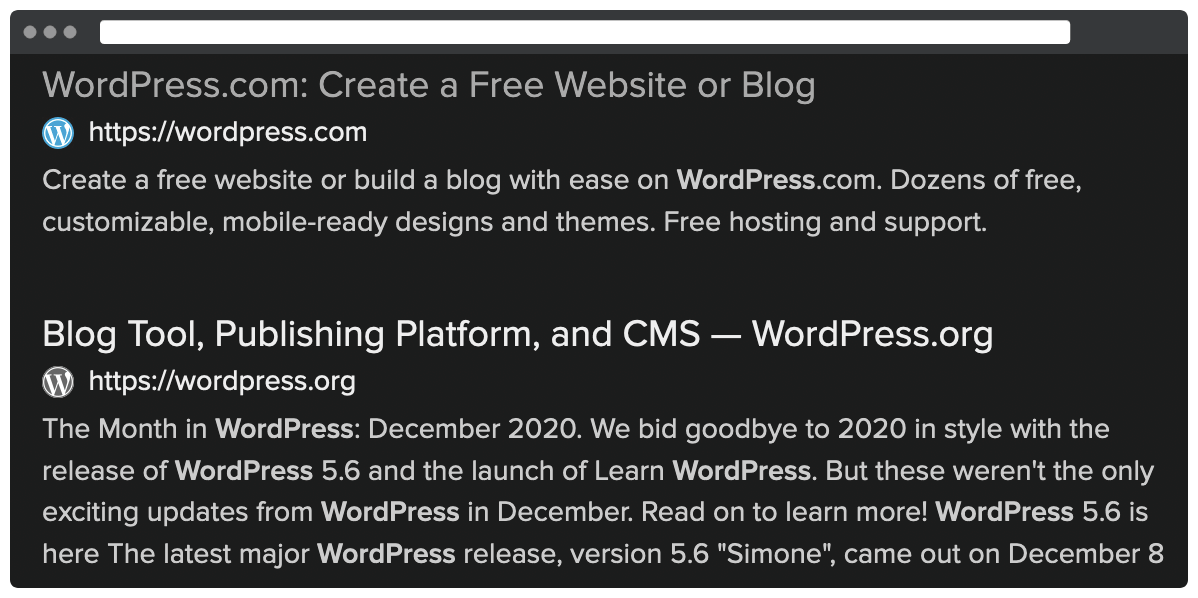
It's substantially a modest icon that displays next to the page tab in your browser, or in Search Engine Results Pages (SERPs):
Consider information technology a digital equivalent to the little ball you attach to your car antenna. However, in that location's a departure between a site icon and the 5,000 other colored balls in Walmart's car park: Y'all tin make a site icon specific to your brand.
When it comes to your site'southward branding, first impressions are of import. What'south more, consumers look to how consistent a brand is equally a trust marking. A site icon can assistance to achieve both of these things.
Granted, your site icon isn't going to carry the entire weight of your branding strategy. Nevertheless, the actress visibility information technology brings – especially if a potential customer is browsing your site – could accept a positive touch on downwardly the line.
How to Create a Site Icon for Your WordPress Website (In iii Steps)
There are ii phases involved in this task. First, you'll want to create a site icon. Then, you lot'll need to upload it to your WordPress website. Hither are three steps you tin take to create a site icon for your WordPress site:
- Choose the right icon size.
- Comport out some optimal practices when designing your site icon.
- Select the right tool for the chore.
We'll then show y'all iii means to upload you icon:
- Utilize the congenital-in functionality of WordPress.
- Install a plugin to upload your icon.
- Code a solution to upload your site icon.
In that location'due south a lot to get through, so permit's get started!
Step 1: Choose the Correct Size for Your Site Icon
Kickoff off, is your site icon'southward size. Y'all'd exist correct in thinking that these files are going to exist pocket-size. However, while the sizes are tiny, understanding the various dimensions can be complex. This is because different platforms have varying requirements for site icon (or 'favicon') sizes.
Generally speaking, most browsers will support a 32 ten 32 pixel .ico file, which has been the standard for decades. Nevertheless, in practice, you'll desire to use a 512 x 512 pixel .png file. The reason is that this covers practically all bases, from the default Chrome site icon size, down to the minimum requirement.
Incidentally, this is also an explicit recommendation within the WordPress dorsum end (more of which later). Once your sizing is prepare, it's fourth dimension to think about design.
Step ii: Ensure You're Using Optimal Practices for Your Site Icon's Design
The temptation for site icon blueprint is simply to utilise a scaled downward version of your site's logo and call it a 24-hour interval. Even so, given our advice on optimal branding, y'all should accept the fourth dimension to work on a custom site icon rather than settle on the like shooting fish in a barrel option.
What's more, the virtual 'room' you lot have means you may not be able to articulate your branding using your regular logo. As such, you'll desire to consider the post-obit when putting together your site icon:
- Distill your branding down to one or ii simple colors that offer consistency and visibility.
- Skin your logo down to the most essential elements, and make this the subject of your site icon.
- Use contrast to give focus to your site icon's master aspects.
To offer a real-earth example of these, look again at the WPKube site icon. Information technology uses blue and white, which offers high contrast, and only contains the site'southward logo.
This is all that's needed. Information technology offers visibility, consistency with the other branding elements, and ensures yous can spot the tab on SERPs and browser screens.
Stride 3: Select the Right Tool to Create Your Site Icon
The final step in one case you lot've sorted your site icon'southward sizing and design is to create information technology. Equally you'd look, at that place are myriad ways to create your icon, and if you have a tool such as Canva, this is going to exist ideal. Alternatives such as DesignBold are also perfect for the job, especially if your business relationship already stores your site logo:

Favicon.io is also fantastic for rapidly creating a text-but site icon, and downloading all of the various sizes y'all demand:
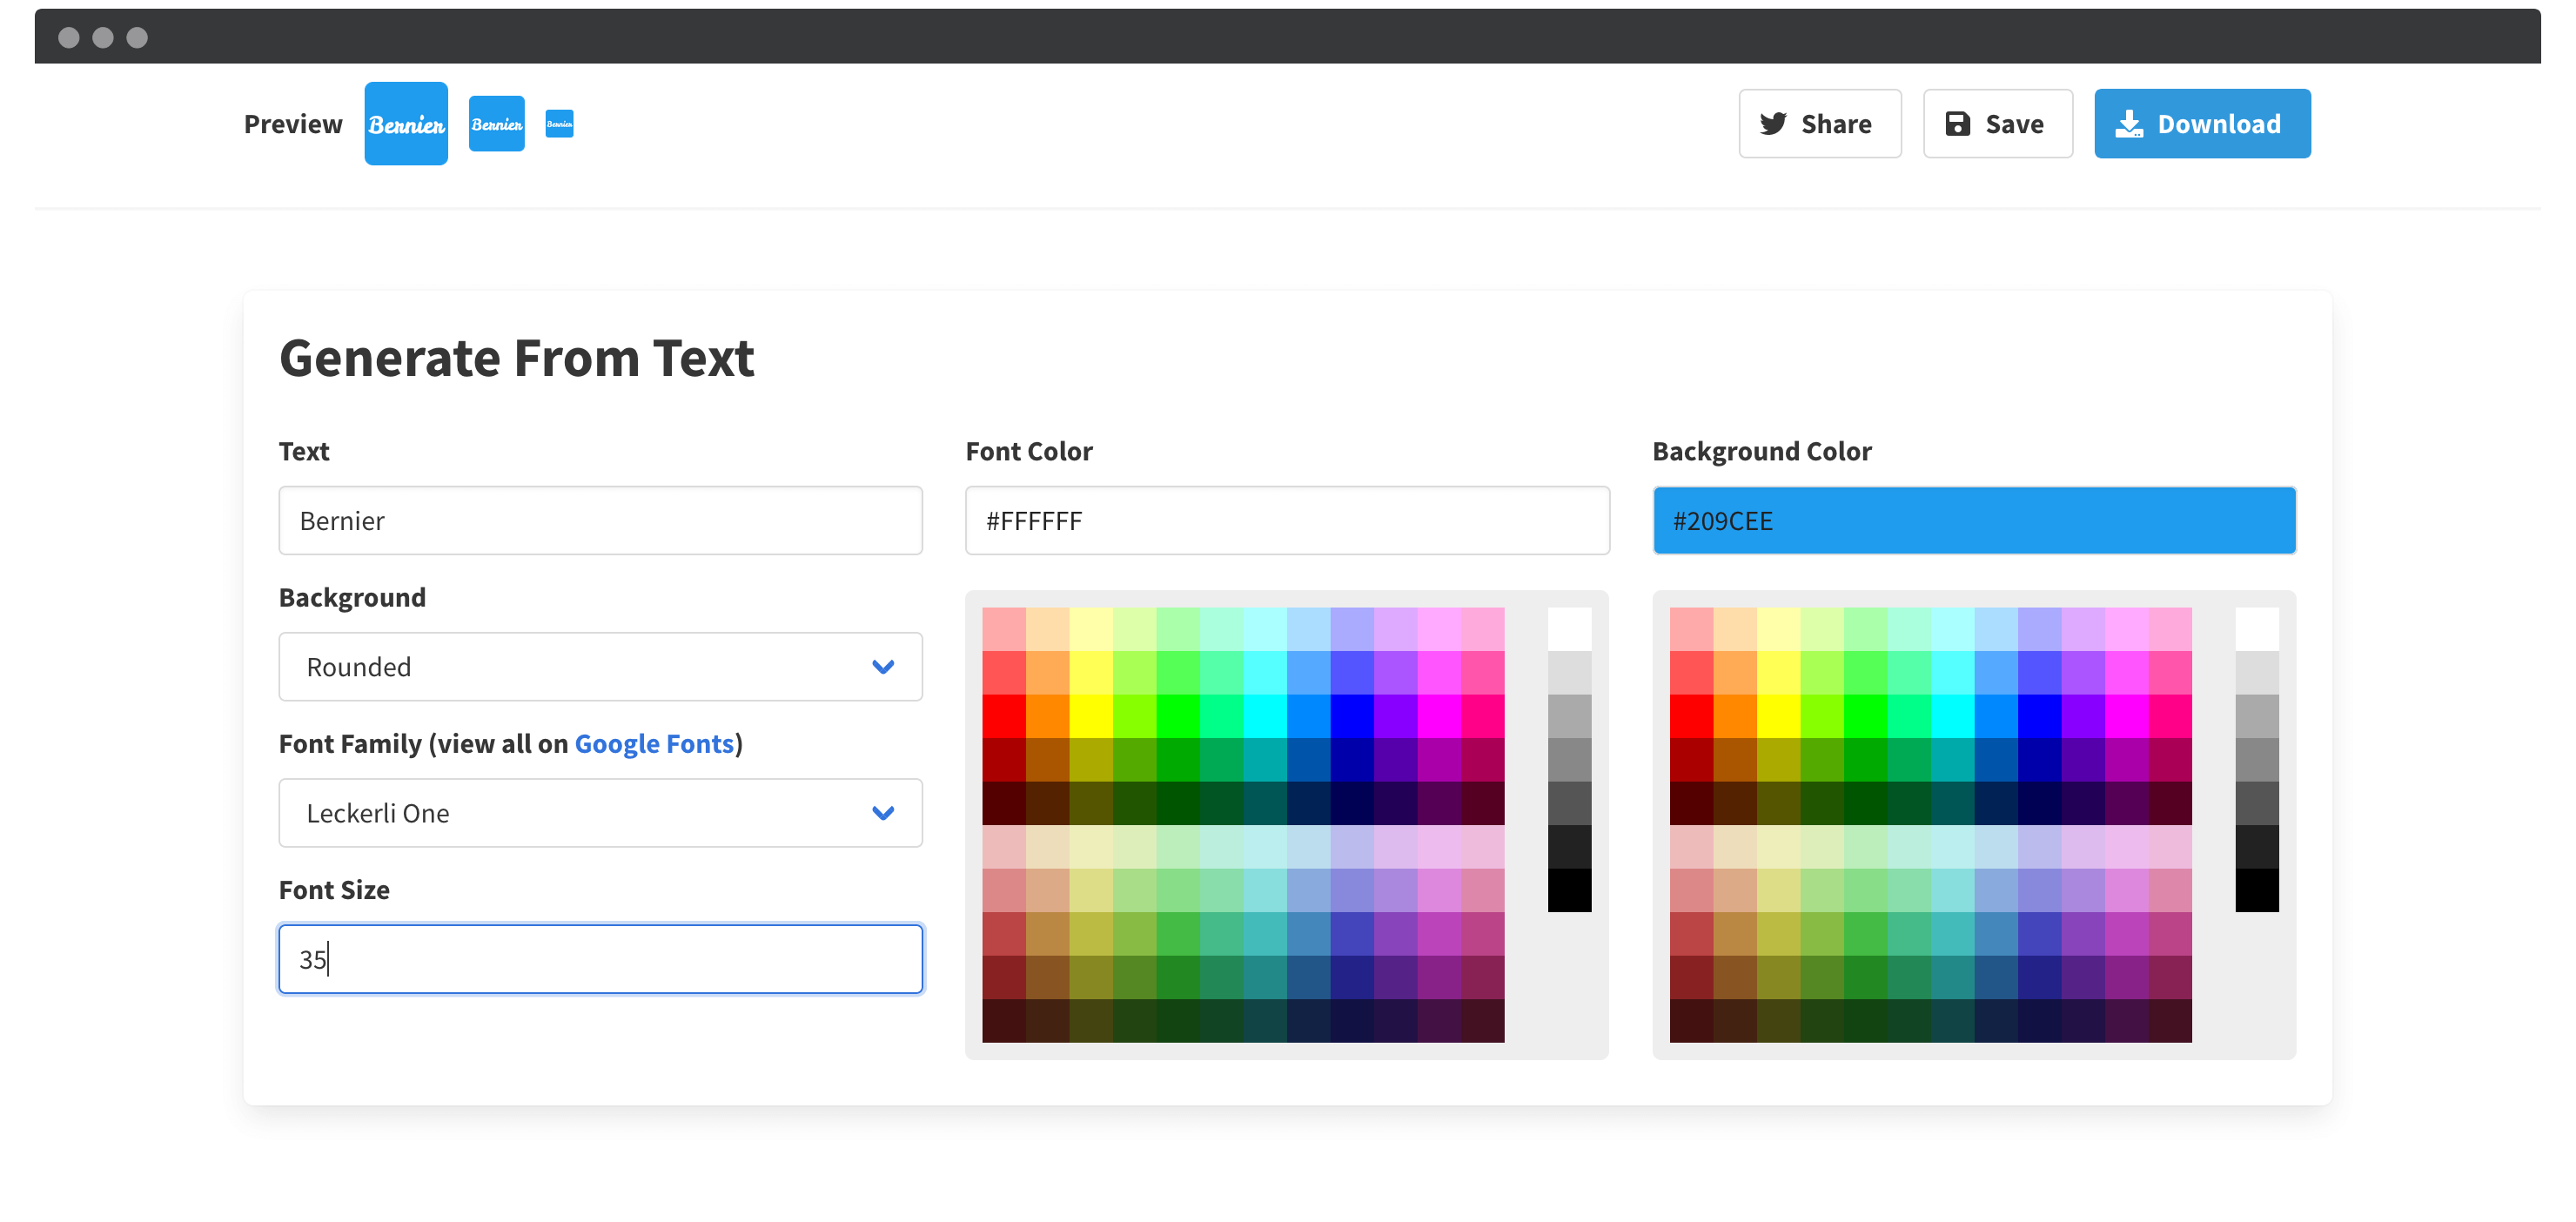
Bear in heed that yous'll demand to salve your site icon as either an eight- or 24-bit nontransparent .PNG file, equally this is the virtually optimal format. Favicon.io does this for you, although you'll have to change settings in other generic editors.
3 Means to Upload Your Site Icon to WordPress
Every bit is standard with WordPress, there are a multitude of ways to upload your site icon. We'll touch on use cases and suitability below, although y'all're free to investigate whatsoever that potentially suits you lot.
ane. Utilise WordPress' Built-In Functionality
The great news for nearly WordPress users is that the platform offers quick and straightforward functionality for uploading a site icon.
If y'all're looking for a no-nonsense approach to the task, this is the method for you.
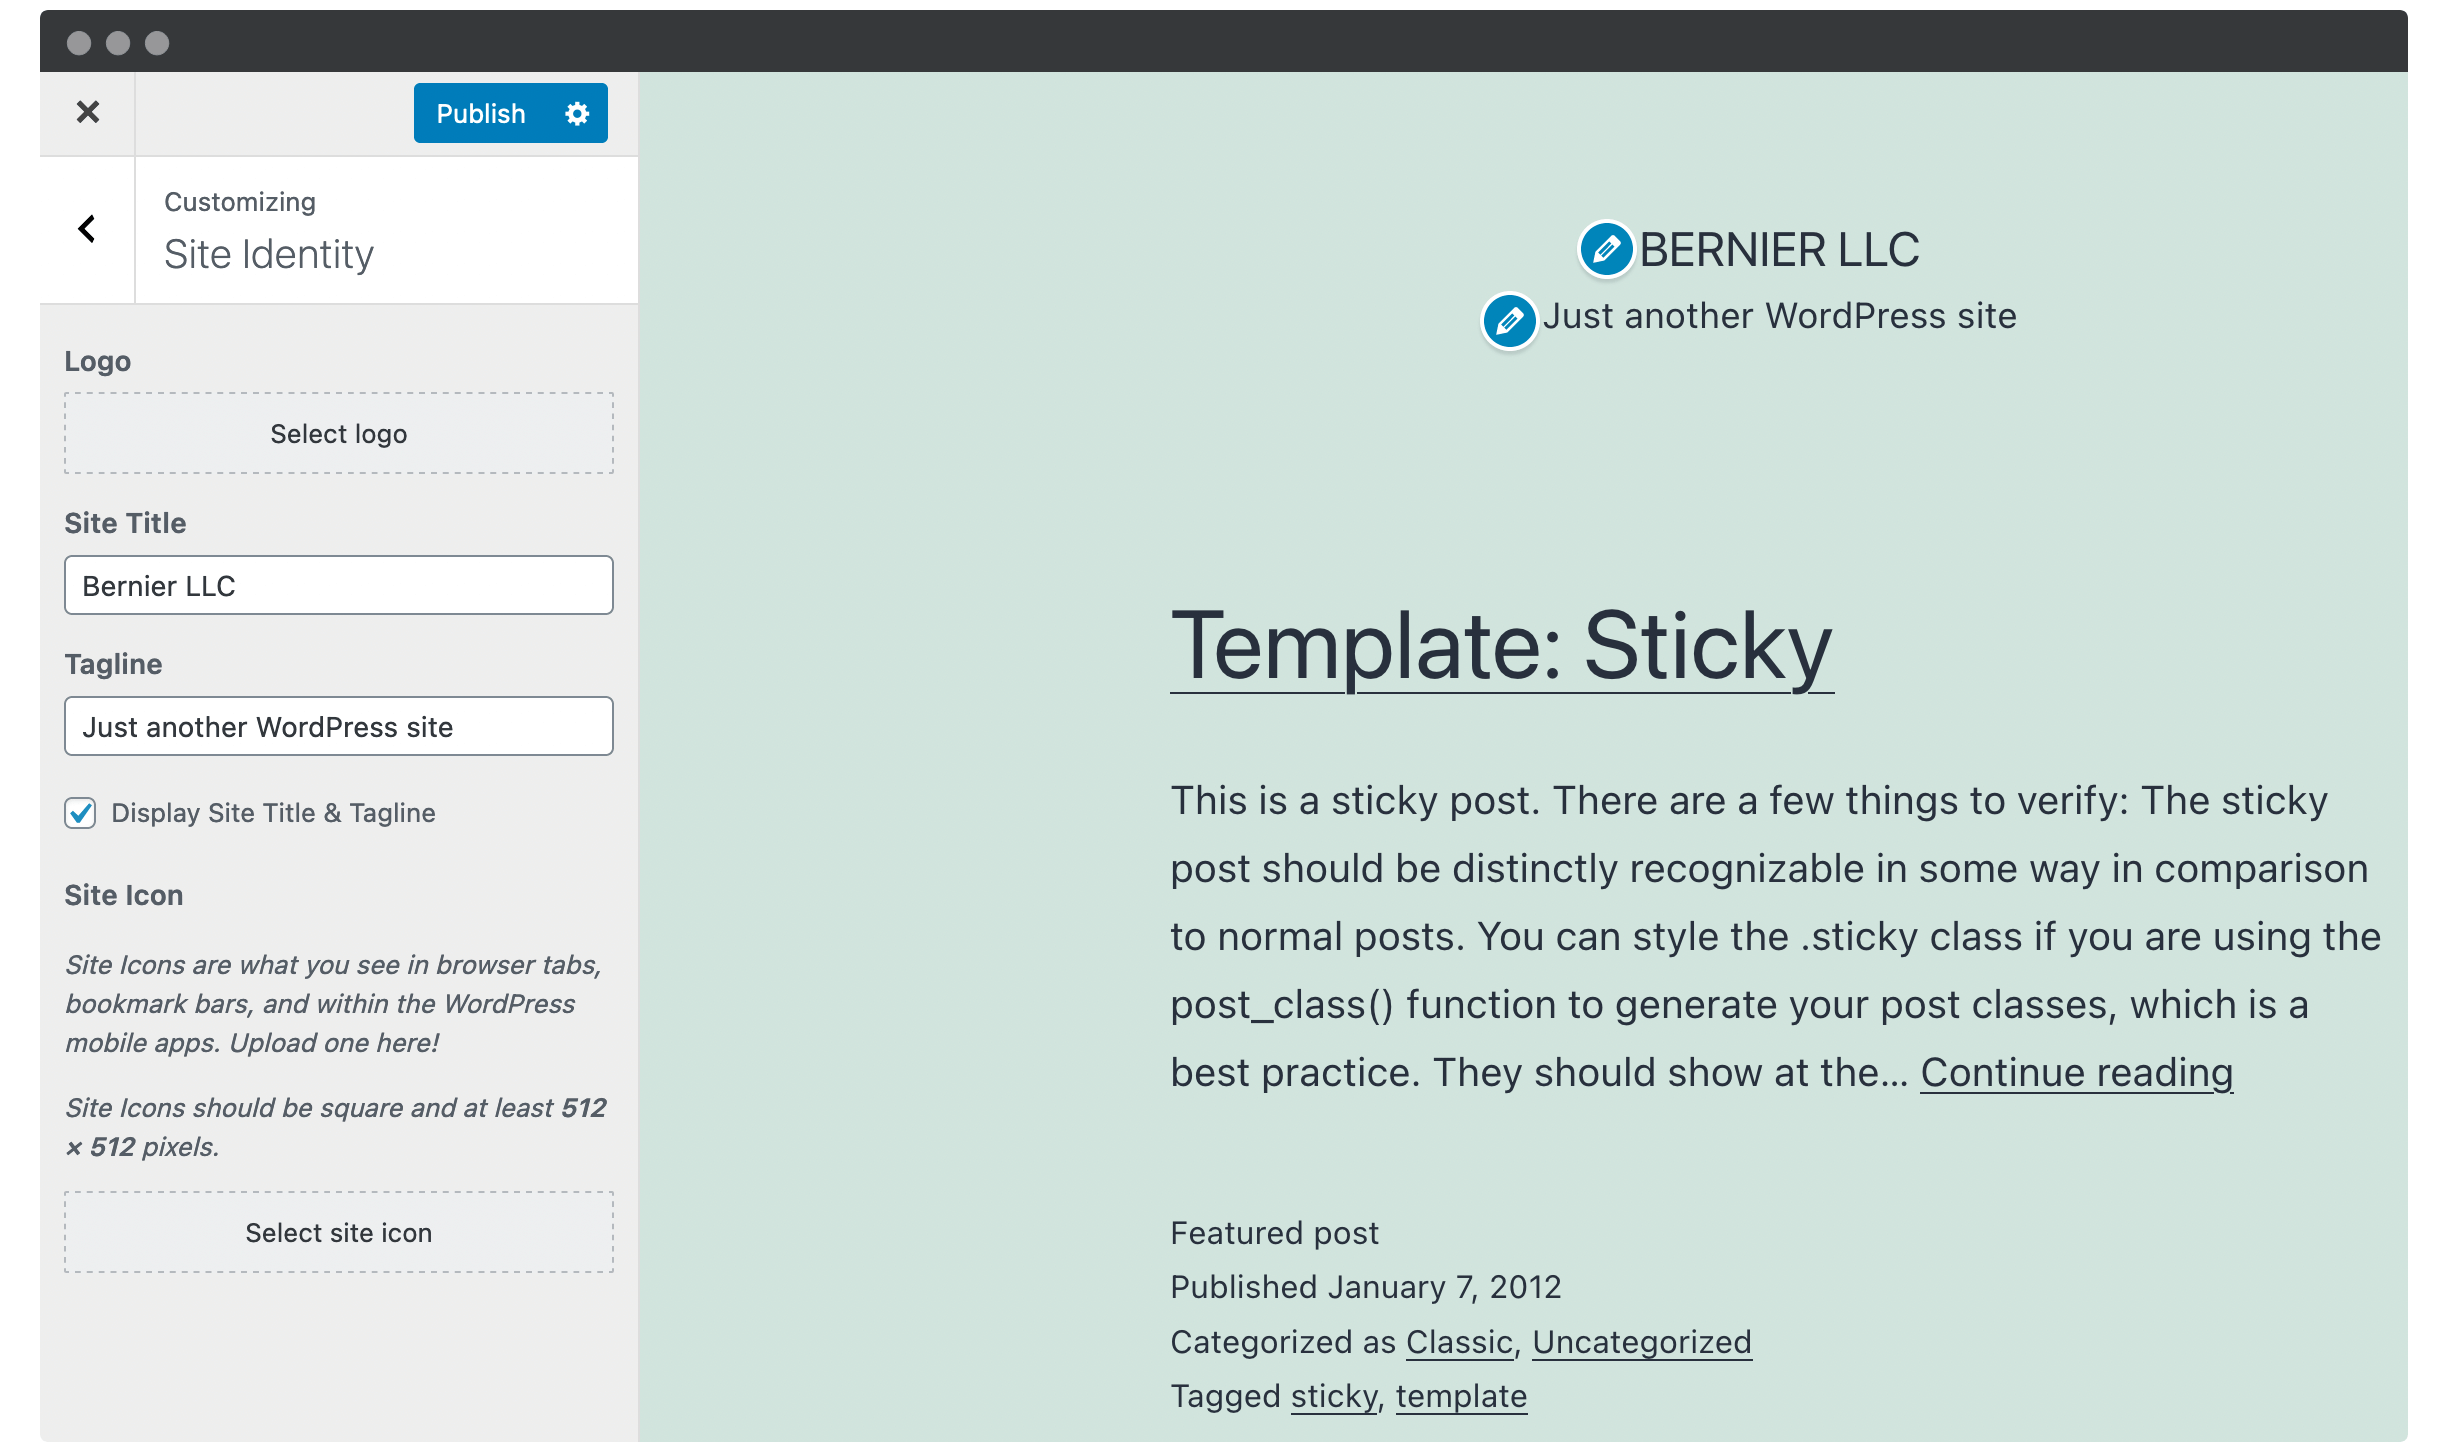
Step 1. Access the Site Identity Screen in WordPress
Outset, log into WordPress. From the dashboard, you'll want to head to your theme options panel. Your premium theme may have dedicated options, although for WordPress' default themes this will be within the Appearance > Customize > Site Identity screen of the Customizer:
Once yous're here, y'all tin move onto the next step.
Pace 2. Select Your Site Icon
Next, accept a look at the Site Identity section for the Select site icon dialog box:
Hither, click and upload as you usually would with WordPress media uploads. Remember to set up suitable 'alt text' for your site icon, to ameliorate your accessibility.
Step 3. Bank check Your Site Icon on the Front Stop
Finally, accept a look at the front end of your site, specifically to see whether your site icon has uploaded correctly. You'll note that WordPress offers a big preview of your current site icon, within a browser mockup:
However, you should notwithstanding take a look at how the icon renders in a browser, mainly because it will testify how the icon looks for other users – a more important cistron.
2. Install a Suitable WordPress Plugin
For many users, installing a WordPress plugin is the 'go-to' solution. All the same, given that practically all WordPress sites have congenital-in Customizer options for doing this, a plugin may be overkill.
We recommend this approach if yous have specific requirements for your site icon, or otherwise don't have the option to upload one using your theme's options.
Step 1. Cull a Suitable Plugin
The title of this step is a slight misnomer, every bit we just recommend one plugin: Favicon by RealFaviconGenerator:

It's essentially a plugin version of the pop website, and supercharges the built-in functionality of WordPress. It generates all of the required site icons from a unmarried image, and stores them in the Media Library.
In one case yous've installed and activated the plugin, you're nigh finished.
Stride 2. Upload Your Full-Sized Site Icon
Once the plugin is activated, you'll notice a new Appearance > Favicon panel within your WordPress dashboard. Heading here brings upwardly an unproblematic set of options:
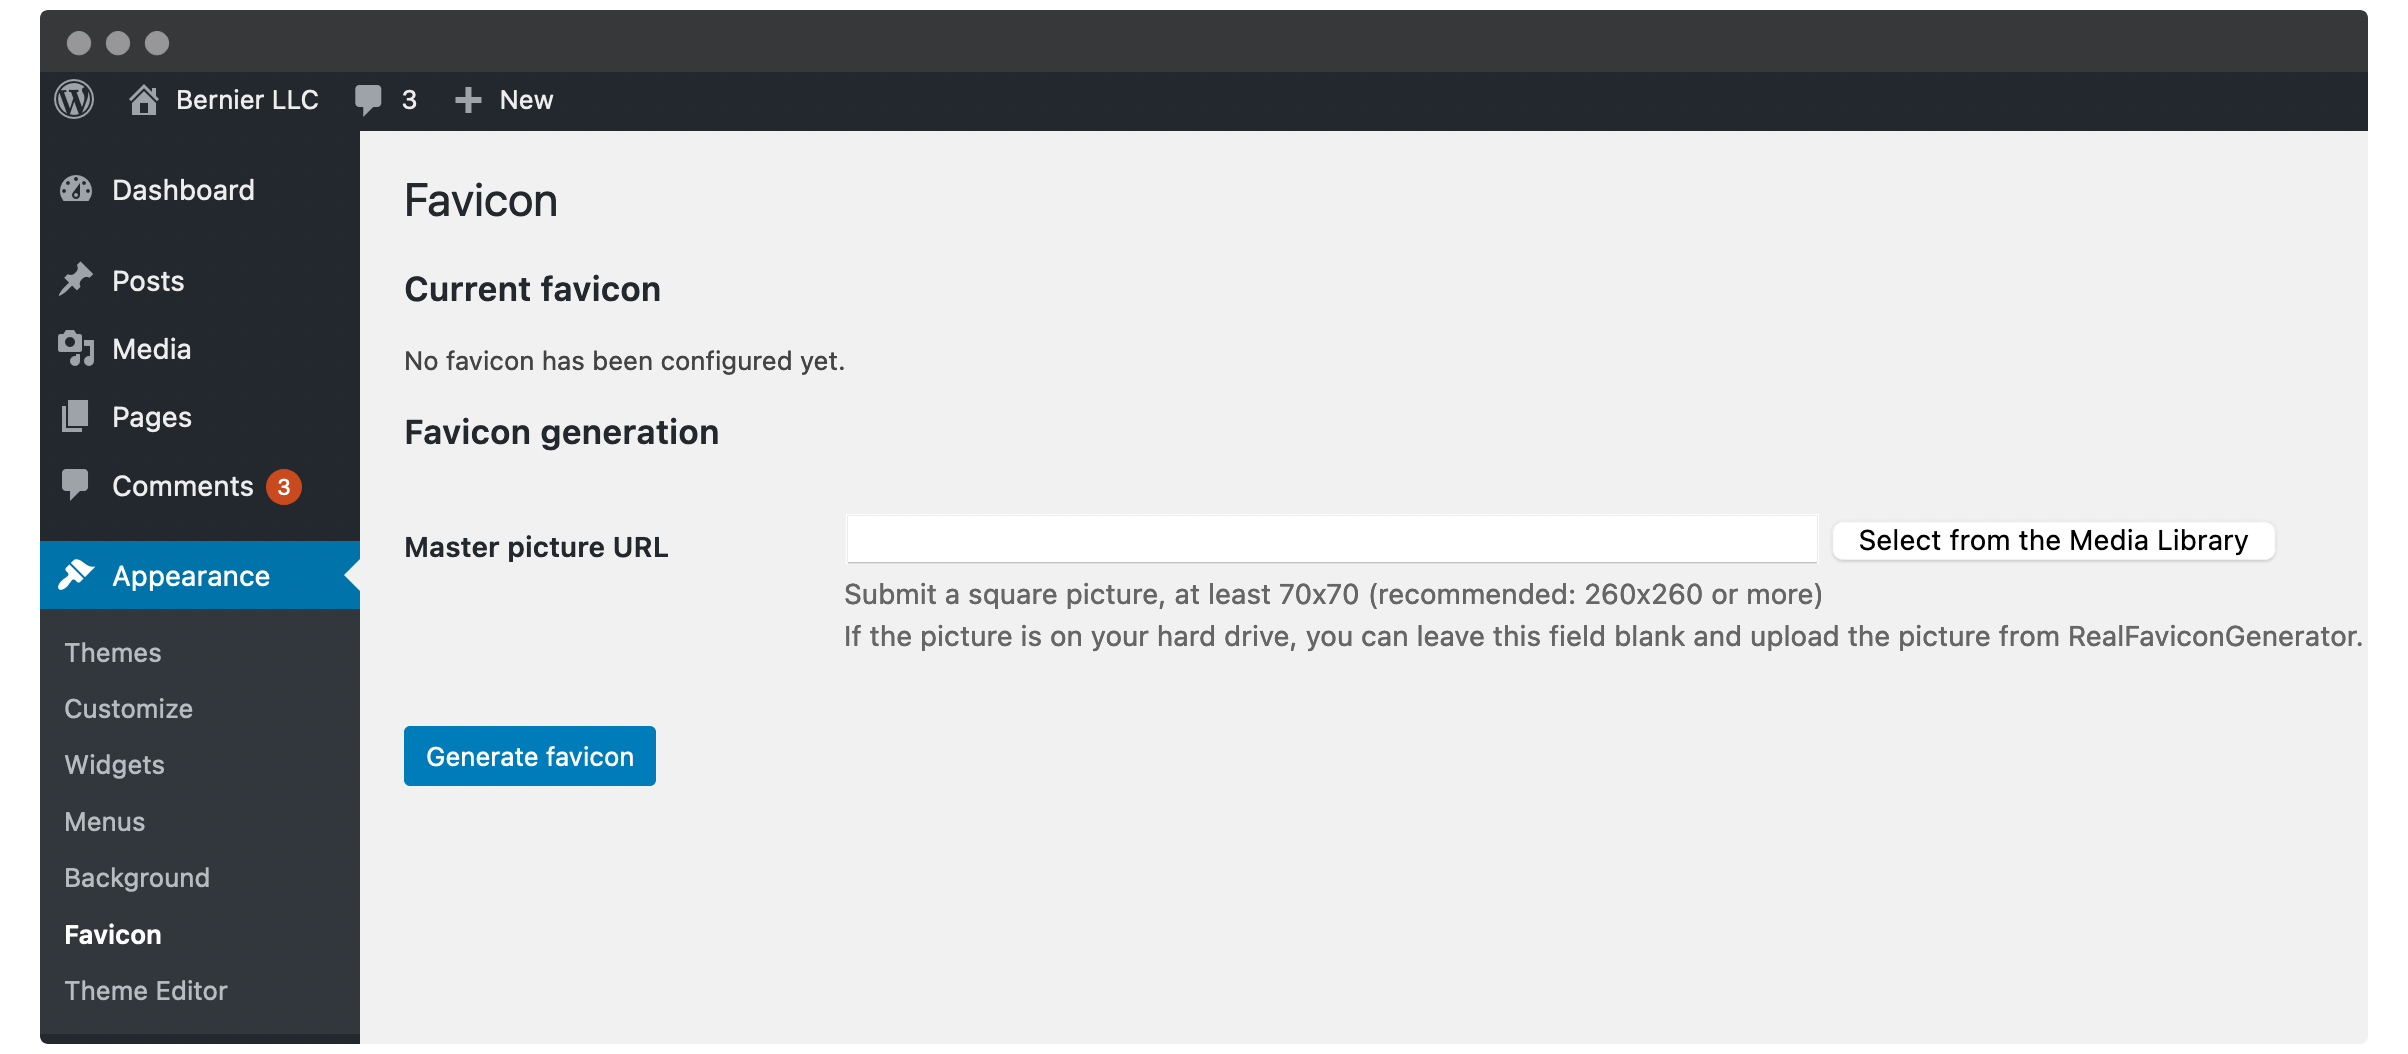
While the wording is slightly confusing, you substantially upload to (or select an image from) the Media Library. Remember to add alt text here if you haven't already.
To begin the upload process, simply click the blueish Generate favicon push button, and move onto the final step.
Pace 3. Download Your Site Icons
One time the plugin begins to generate your site icons, yous'll notice it switches to a web app version of the developer'southward site. This is where you'll notice all of the different site icons for various platforms and dimensions:
Note that you tin choose some additional platform-specific options here, relating to the design and presentation of your site icon:
However, once you're ready, click Generate your Favicons and HTML code, at which indicate the plugin will piece of work its magic.
Finally, you'll exist taken back to your WordPress dashboard, where you'll encounter previews of your site icons in various mockups:
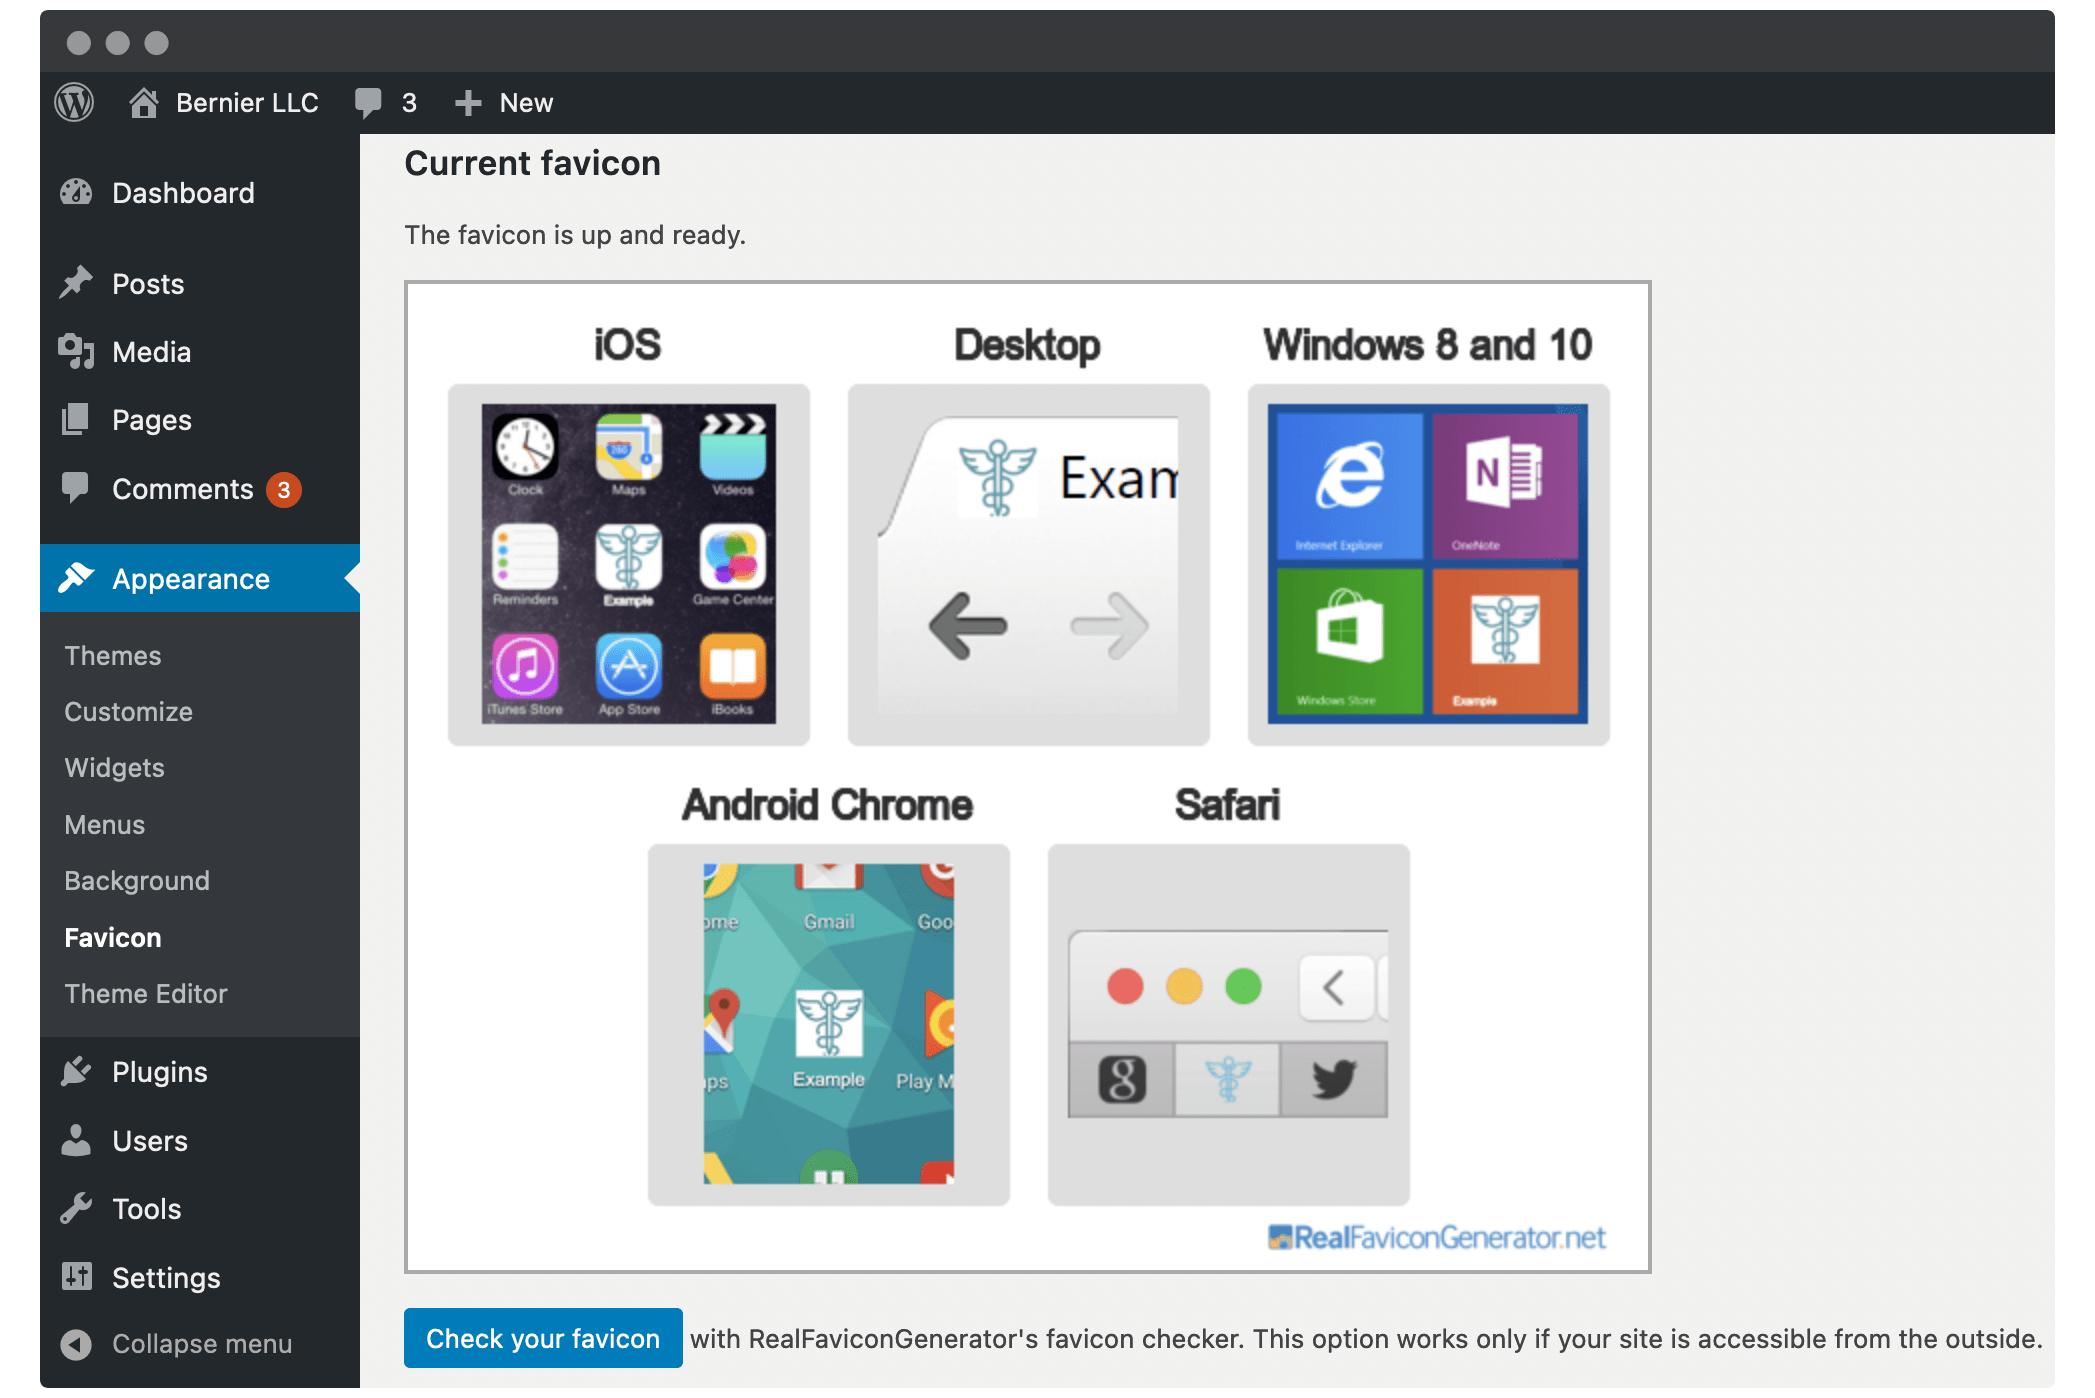
Your site icon should now be ready to roll – again, yous'll want to check the front to be sure.
3. Work With Code to Display Your Site Icon
The final approach we'll include is arguably outdated for boilerplate users, given the alternatives. However, using code to display your site icon is ideal for very verbal requirements, or fifty-fifty if you lot're creating a custom theme.
Pace 1. Access Your Site's Server Using File Transfer Protocol (FTP)
For this approach, yous'll need server access through FTP. What's more than you'll demand a suitable client such as Cyberduck or Filezilla, and precipitous plenty skills. Because we'll exist working with WordPress' cadre files, using a child theme is as well recommended.
One time you have these in place, log into your server using the credentials found within your hosting control panel. If y'all're unsure where to find them, you should contact your host's support channels. They may besides exist found in an email you received when y'all originally purchased hosting.
Step 2. Upload Your Site Icon Files to WordPress
One time you've accessed the server, your FTP client should prove you a directory list of your site:
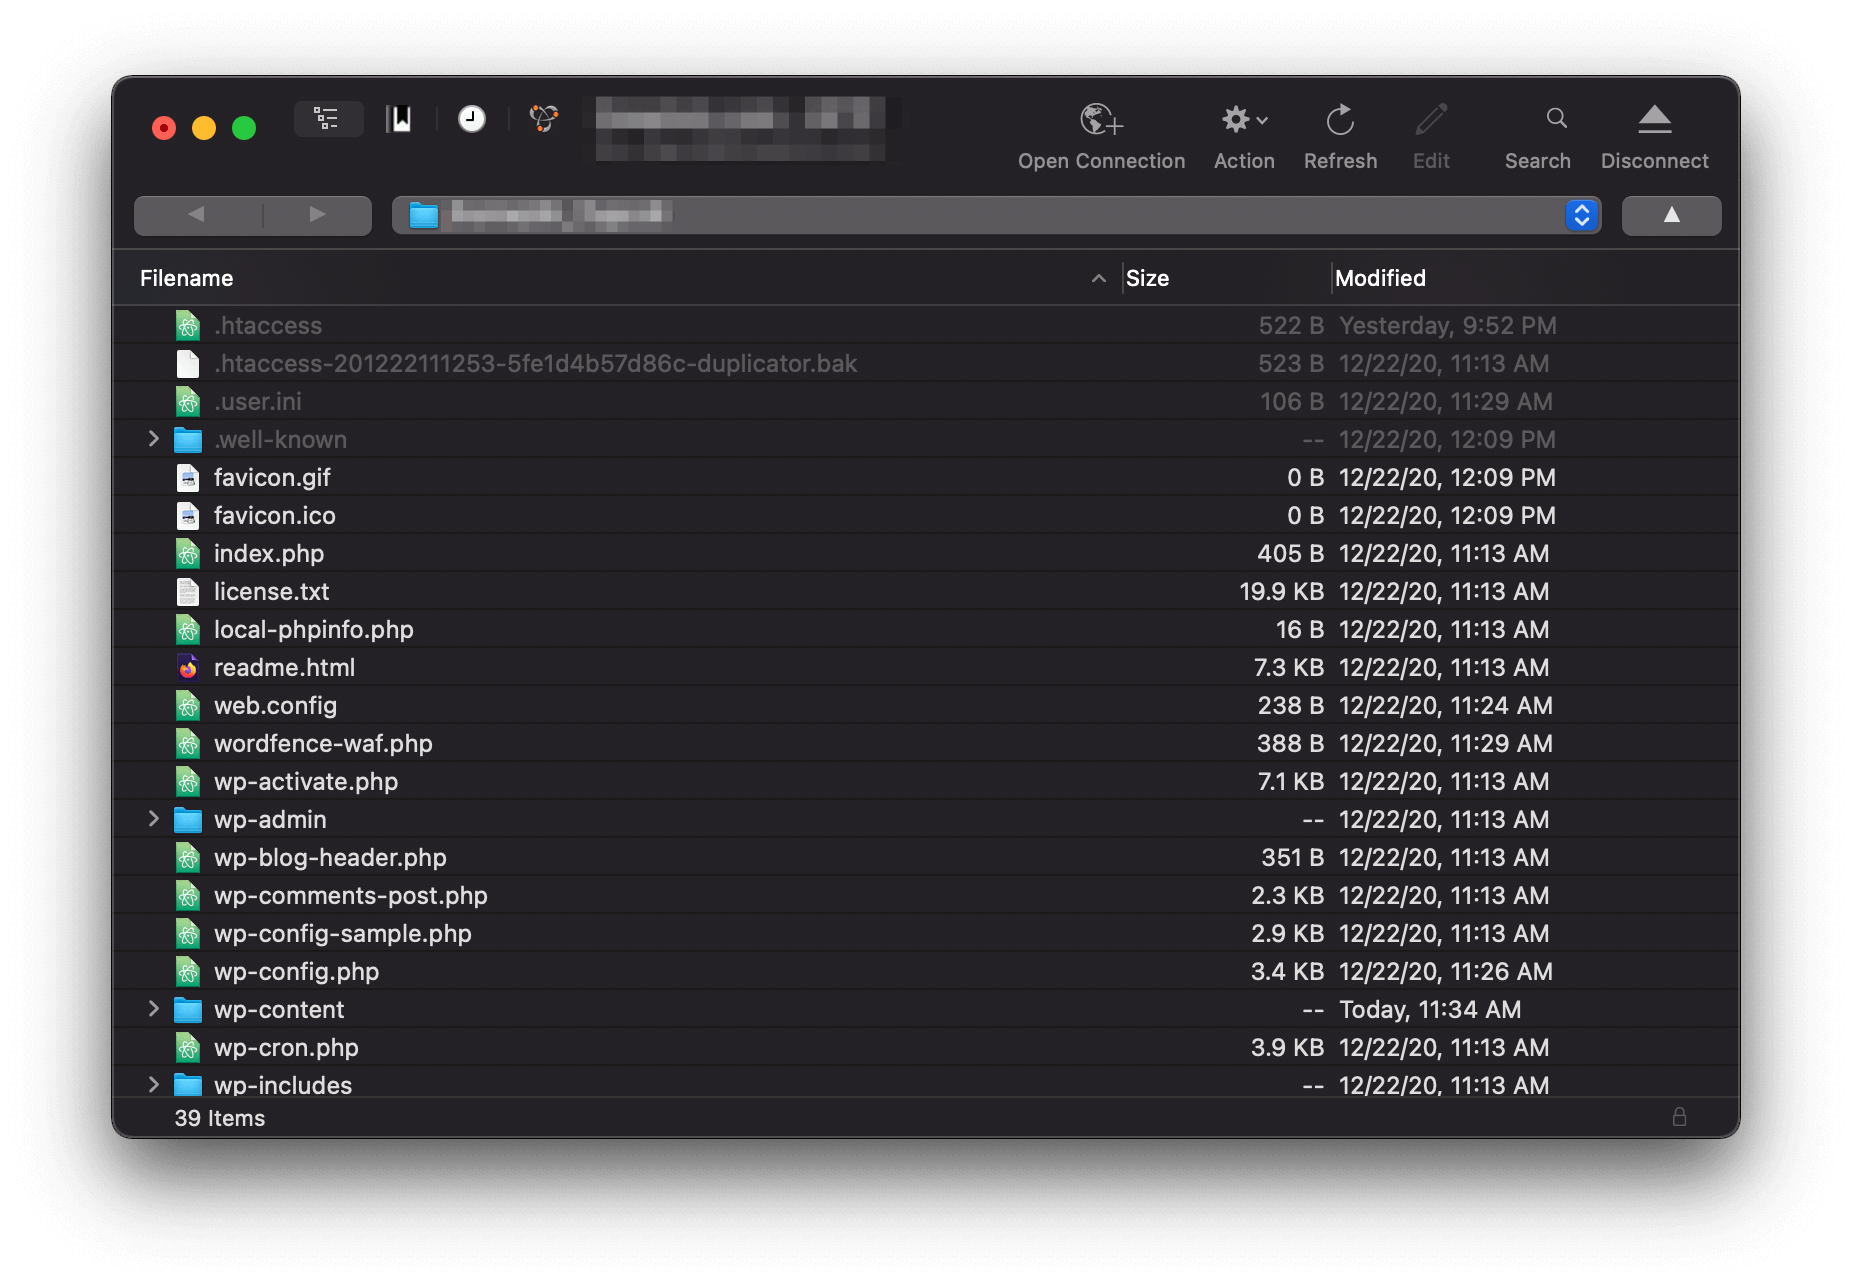
Here, have your site icon file, and upload information technology to both your primary theme's folder (found within wp-content > themes) and the root directory of your site.
At this point, you're most done. The final stride is to hard-lawmaking your site icon into WordPress.
Stride three. Add Code to Your Website's Header
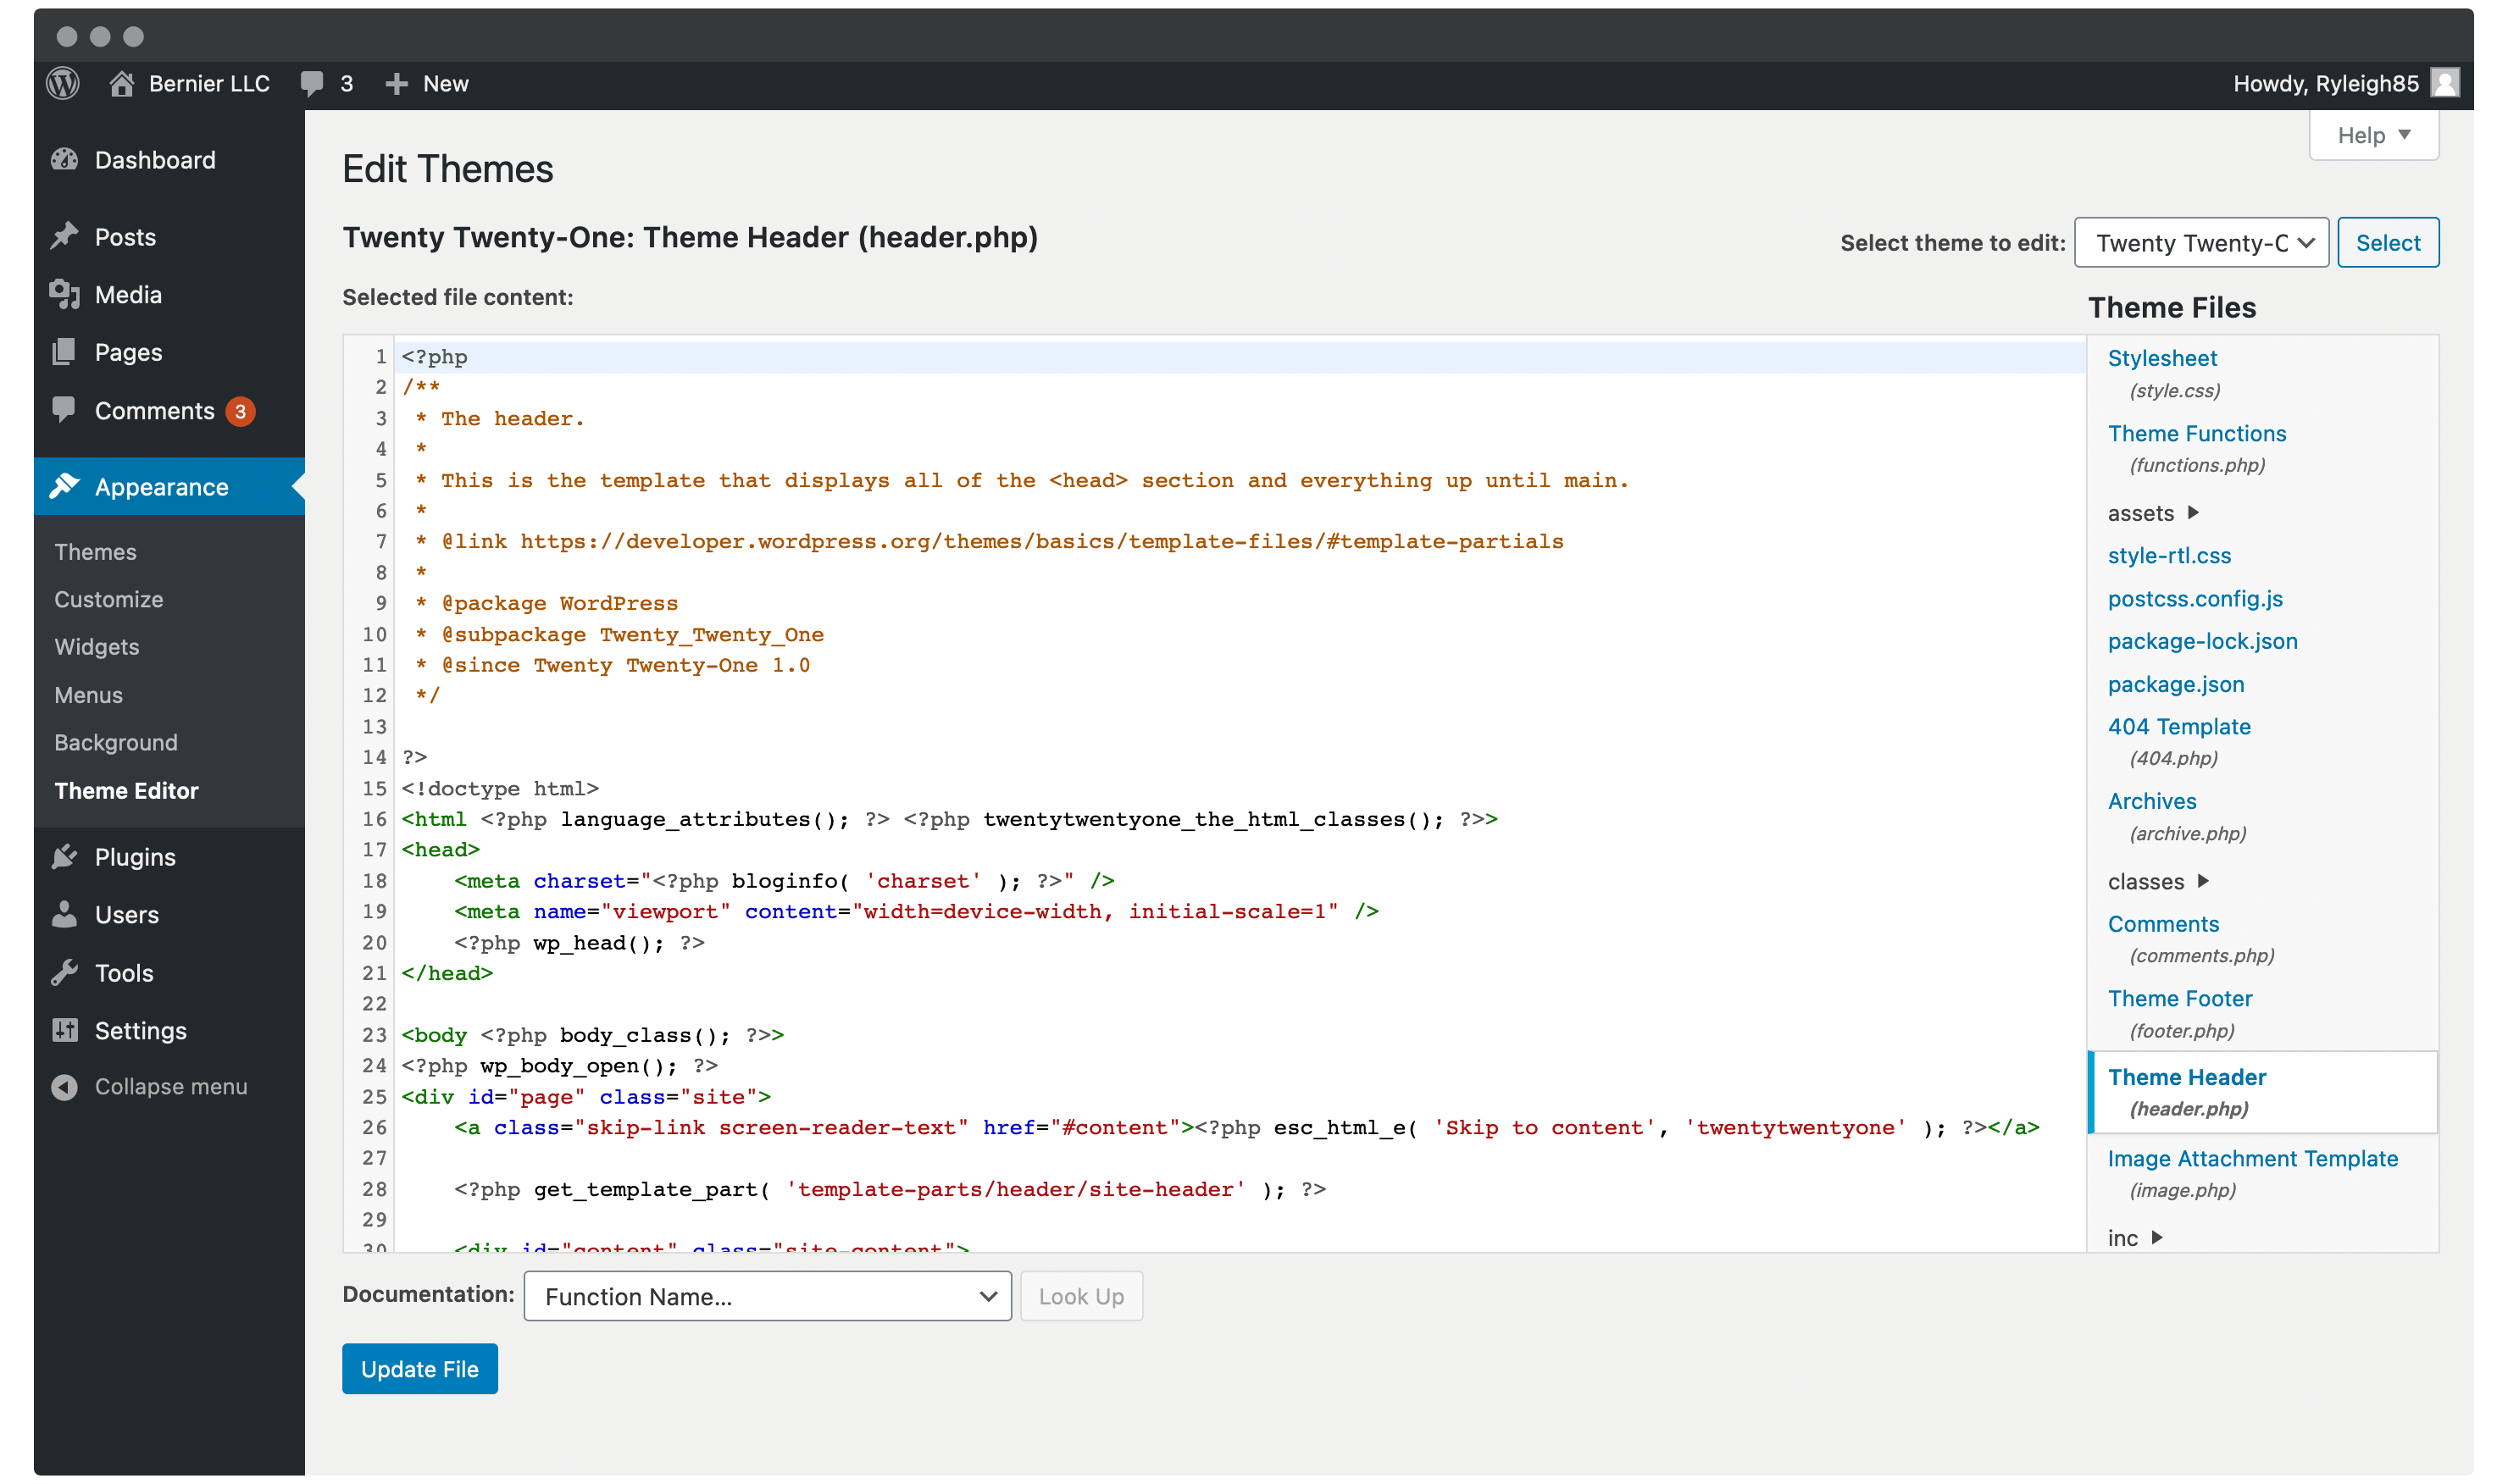
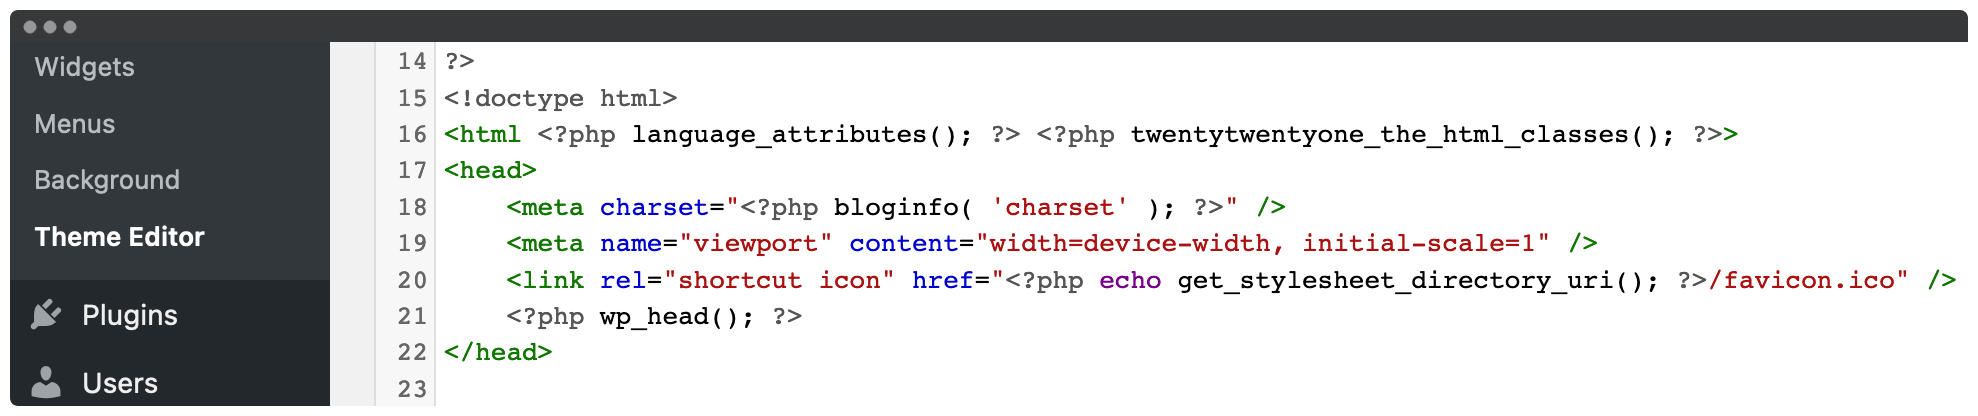
For the final footstep, you'll desire to head back to WordPress, specifically to the Appearance > Theme Editor page:
When yous start access the page, a warning dialog will pop upwardly. Beginners to this screen will desire to read the notice, before clicking I understand.
The screen proper will testify the code that makes up your entire WordPress site here, and everything is editable, so proceed with caution.
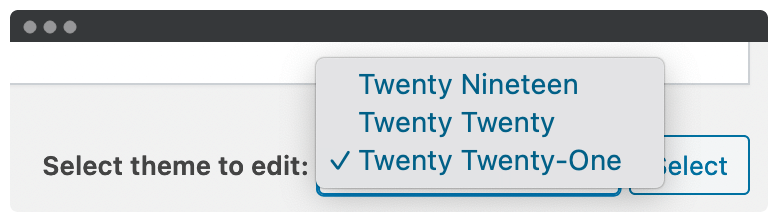
Y'all'll first want to check that y'all're working with the right theme in the Select theme to edit drop-down carte:
Next, scroll down the Theme Files list until you find the Theme Header (header.php) option. You'll want to select this here, which volition brandish your header.php file in the editor.
Y'all'll desire to search for a line of code that begins, <link rel="shortcut icon" and ends with /favicon.ico" />. If yous find it, replace information technology with the following line of lawmaking:
<link rel="shortcut icon" href="<?php repeat get_stylesheet_directory_uri(); ?>/favicon.ico" /> If the line doesn't exist at all, you can add together the line in betwixt your <head> tags:
Finally, click the blueish Update File button, and then check out your site icon on the front end.
In Summary
In a nutshell, your site's icon tin can help users recognize your brand, and improve your visibility. Any opportunity to snare potential customers should exist considered; given the time and resources you need to create a site icon, the determination to do so is easy.
In this post, we've looked at how to create a site icon for your WordPress website using 3 methods. Let'south quickly recap:
- Use WordPress' born functionality to upload your icon.
- Install a plugin such as Favicon by RealFaviconGenerator.
- Brandish your site icon using code.
Is a site icon going to be a part of your site's overall branding strategy? Share your thoughts in the comments department beneath!
Source: https://www.wpkube.com/how-to-create-a-site-icon-for-your-wordpress-website/
0 Response to "It Doesnt Say I Uploaded a Site Icon Wordpress"
Postar um comentário